Being an excellent programmer is not only about learning programming. Programmers need tools to assist them with their work. And one of the most important tools that programmers use every single day is git.
What is git?
git is a version control system.
A version control system, in the simplest terms, allows you to maintain different versions (snapshots) of your code while your code is growing.
And this gives you the following benefits.
1- disaster recovery
Since a version control system allows you to have different versions of your source code. If your newest version is not working for whatever reason (may be it’s that new hire), you can easily roll back to a version of the code that you know is working.
2- collaboration
Version control systems facilitate collaborative development.
Development as a team would have been a nightmare without systems like git (and others).
With that said, git is the most popular version control system there is nowadays. And this is likely to last for some serious time. You can quote me on that.
So now that you are sold on the importance of git, how do you learn git?
In the rest of this article, I will cover the 5 steps that you need to progress through while learning git.
I will do this by walking you through a very basic tutorial.
For each step, I’m going to cover the basics but it’s up to you to go ahead and make sure you understand each topic in depth by fiddling with git yourself and reading more resources.
Follow these steps, in the presented order, and make sure you study each step thoroughly before you move on to the next one.
Here is what this article will cover.
- Forget about github, learn git locally
- Branch out
- Learn how to merge branches
- Learn how to resolve merge conflicts
- Get comfortable with git remotes
Step 1: Forget about Github, learn git locally
To avoid any confusion, and to make sure that your learning process starts out with the right mindset, I want you to completely forget that Github exist.
The reason is that many beginners confuse git with Github.
They are two completely separate things.
By pretending that Github doesn’t exist, you will be able to gather the git concepts much faster.
In this step, all you need is your laptop.
You don’t even need an internet connection.
Let’s get started.
First: Creating a git repository
Let’s say you want to start working on a new coding project. Let’s call it helloworld.
So you go ahead and create a directory called helloworld where you will store all your project source files.
Now because you are a smart person, you know that you need to create a git repo in order to version control your source code.
Doing so is stupid easy!
Just head to the helloworld directory and run the git init command:

And just like that, you have a git repo.
It’s time to start actually writing code!
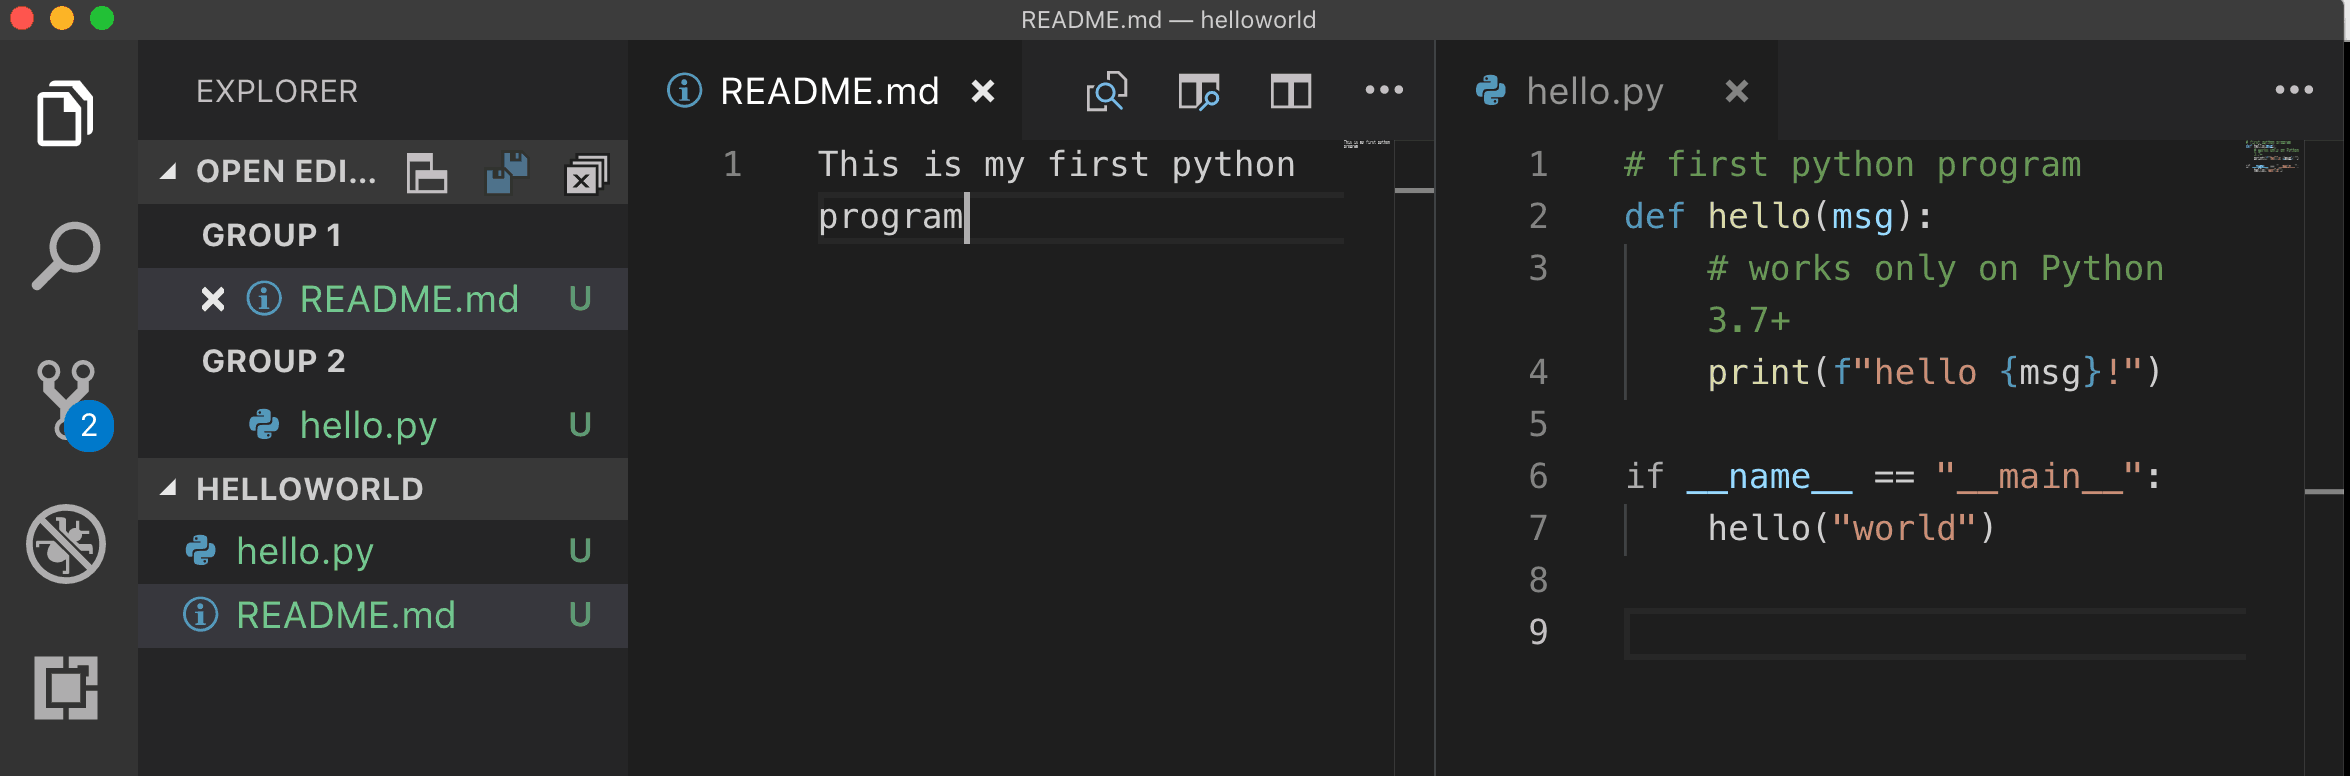
For simplicity, let’s create a README.md file and a Python hello world program hello.py
Second: Staging your changes
By creating these two file, you have populated your directory. However, your git repo is still empty!
The first rule of git is, your working directory is NOT your repo
The reason your git repo is empty is because you need to explicitly tell git to take a snapshot of your code.
Each snapshot (or version) of your code is called a commit and each commit is uniquely identified by a hash which is a function of the content of your source files, some metadata, and other things.
To tell git to take a snapshot of your code, you do so by first staging the files that you created or modified and then committing them.
Staging a file means that you are telling git to take the changes in that file into consideration the next time you take a snapshot of your code.
For example, to stage hello.py, you run the git add command.

Cool, now git knows that the next time you take a snapshot of your code hello.py will be included.
Third: Committing your changes
Committing your changes is the actual act of taking a snapshot of your code.
But again remember that this snapshot will only contain the changes in the files that you have staged in the previous step.
These changes could be adding, removing, or modifying the contents of a file.
In our case, there is one change that we staged and that is creating a new file hello.py
Even though we also created a README file, git will not see the new file until it is staged as well.
To create a commit, you use the git commit command and you also provide a nice, descriptive message about this commit.

Perfect.
Let’s also stage and commit the README.md. 
By now, you should have two commits in your repo.
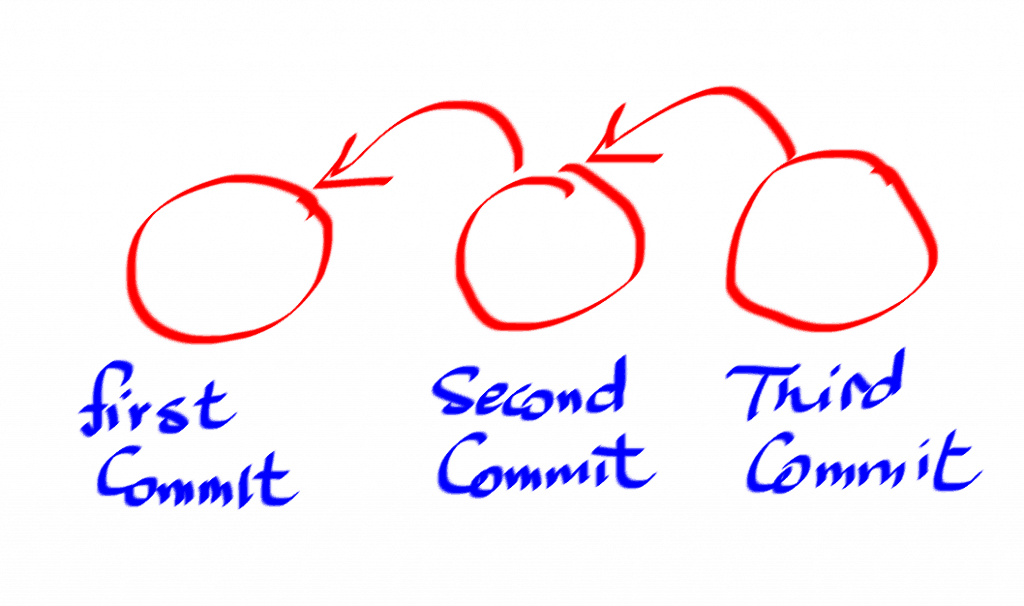
Each commit you make is stored in the git repo with a pointer to its parent commit, much like how a linked list would look like.
So if you have three commits in your repo, this is how they will look like, conceptually.
But is it really a linked list though?
Well read on and you will find out!
Step 2: Branch out
In fact, git allows you to branch out from the main branch (which is by default called the master branch).
But why? What’s the point?
Assume you have an idea of a new feature that will require a significant change/refactoring to your existing code and you want to experiment with this idea without risking the stability of your existing codebase.
One way to do that is to create a branch off of master and experiment with your idea risk-free.
Branching is extremely useful especially when you are working on a project collaboratively because it allows individual developers to branch out and code away without stepping on each other’s feet.
Let’s go back to our example and create a branch.
To create a branch, you have to give it a name.
Let’s call our new branch feature.
Use the git branch command as follows

Notice that the above command only creates a new branch but you are currently still on the master branch.
In other words, any work you do and any commits you make will be added to the master branch, not the feature branch.
To go from one branch to another, you use the git checkout command.

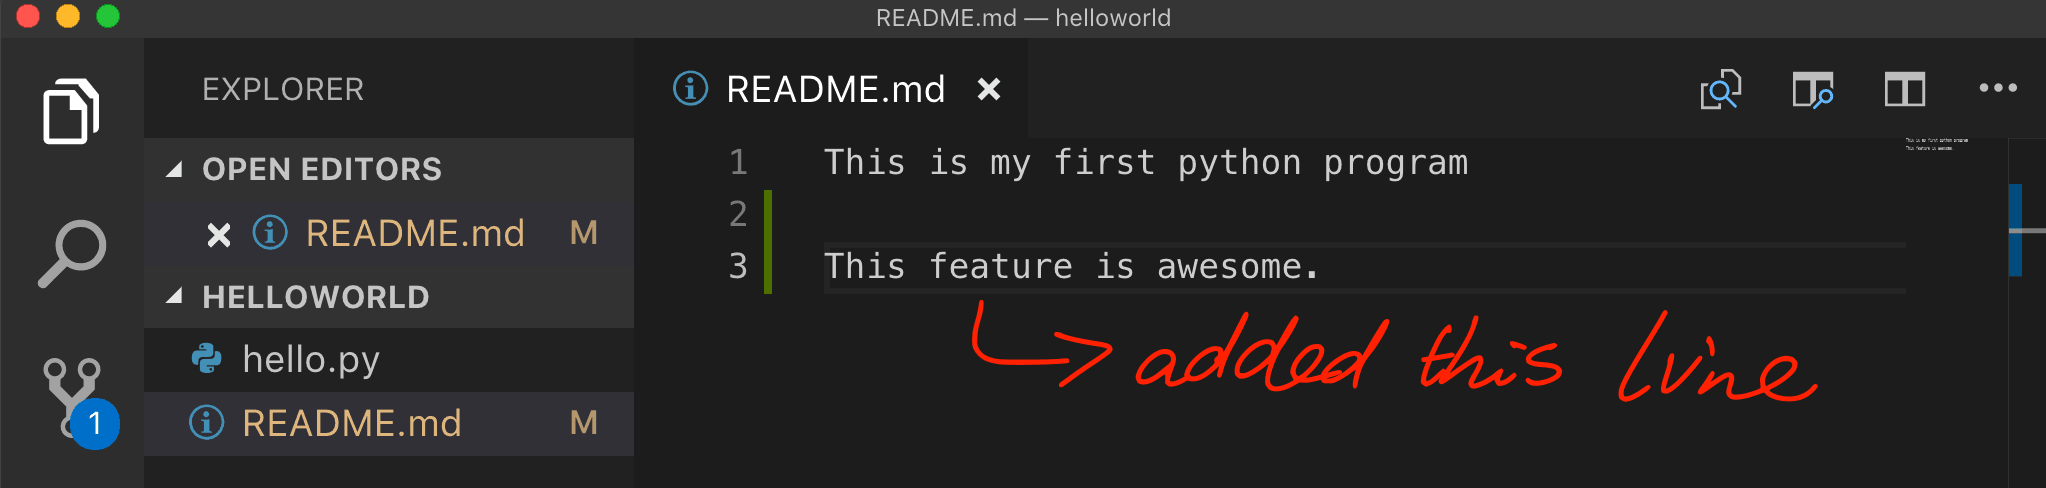
Now let’s modify the README file and create a commit in the feature branch.

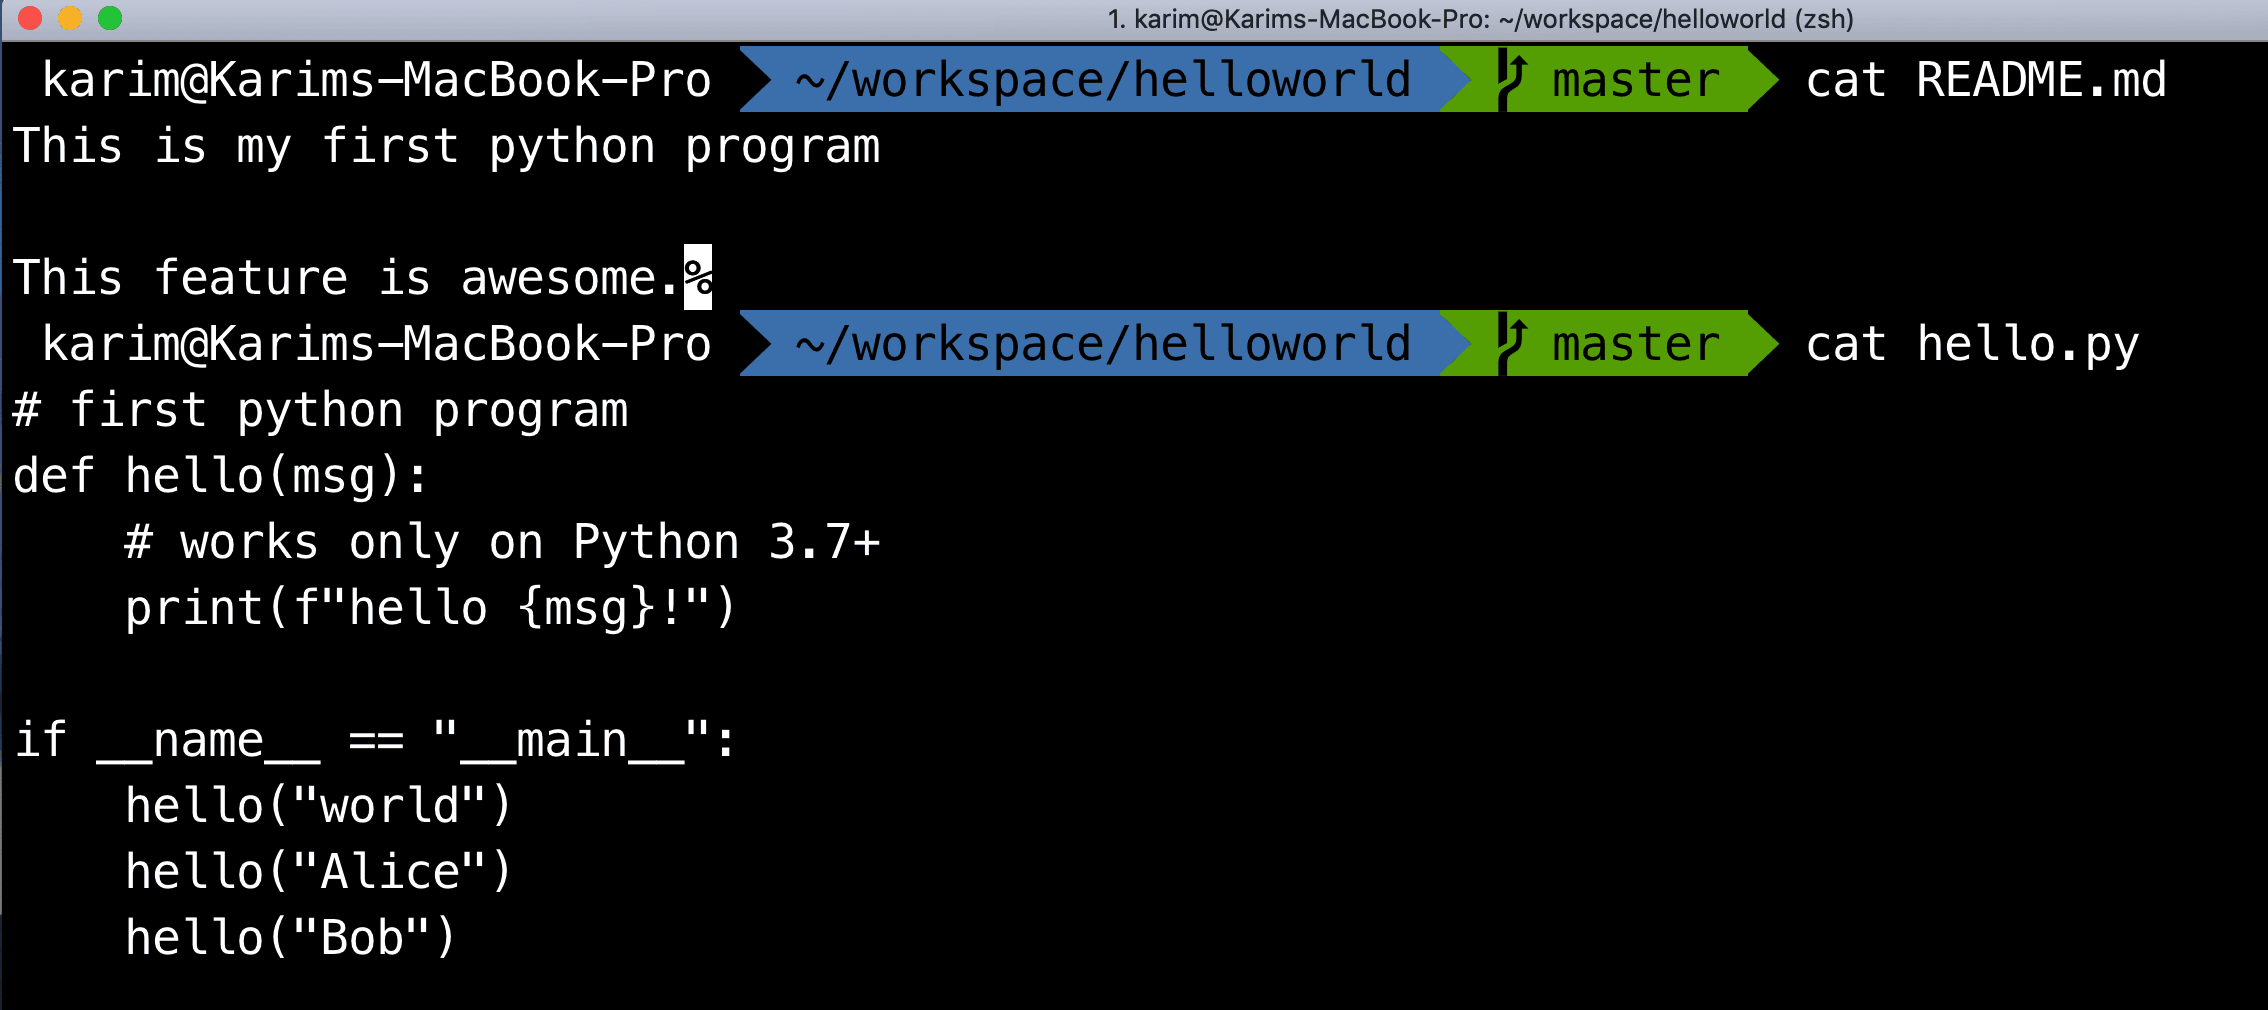
Now, let’s go back to master and inspect the README file

As you can see, even though we have modified the README file in the feature branch, this modification is not reflected on the master branch.
Both branches can be worked on completely separately from this point on.
Since we are on the master branch, let’s create another commit here because why not?
May be let’s just modify the hello.py file and make a new commit.
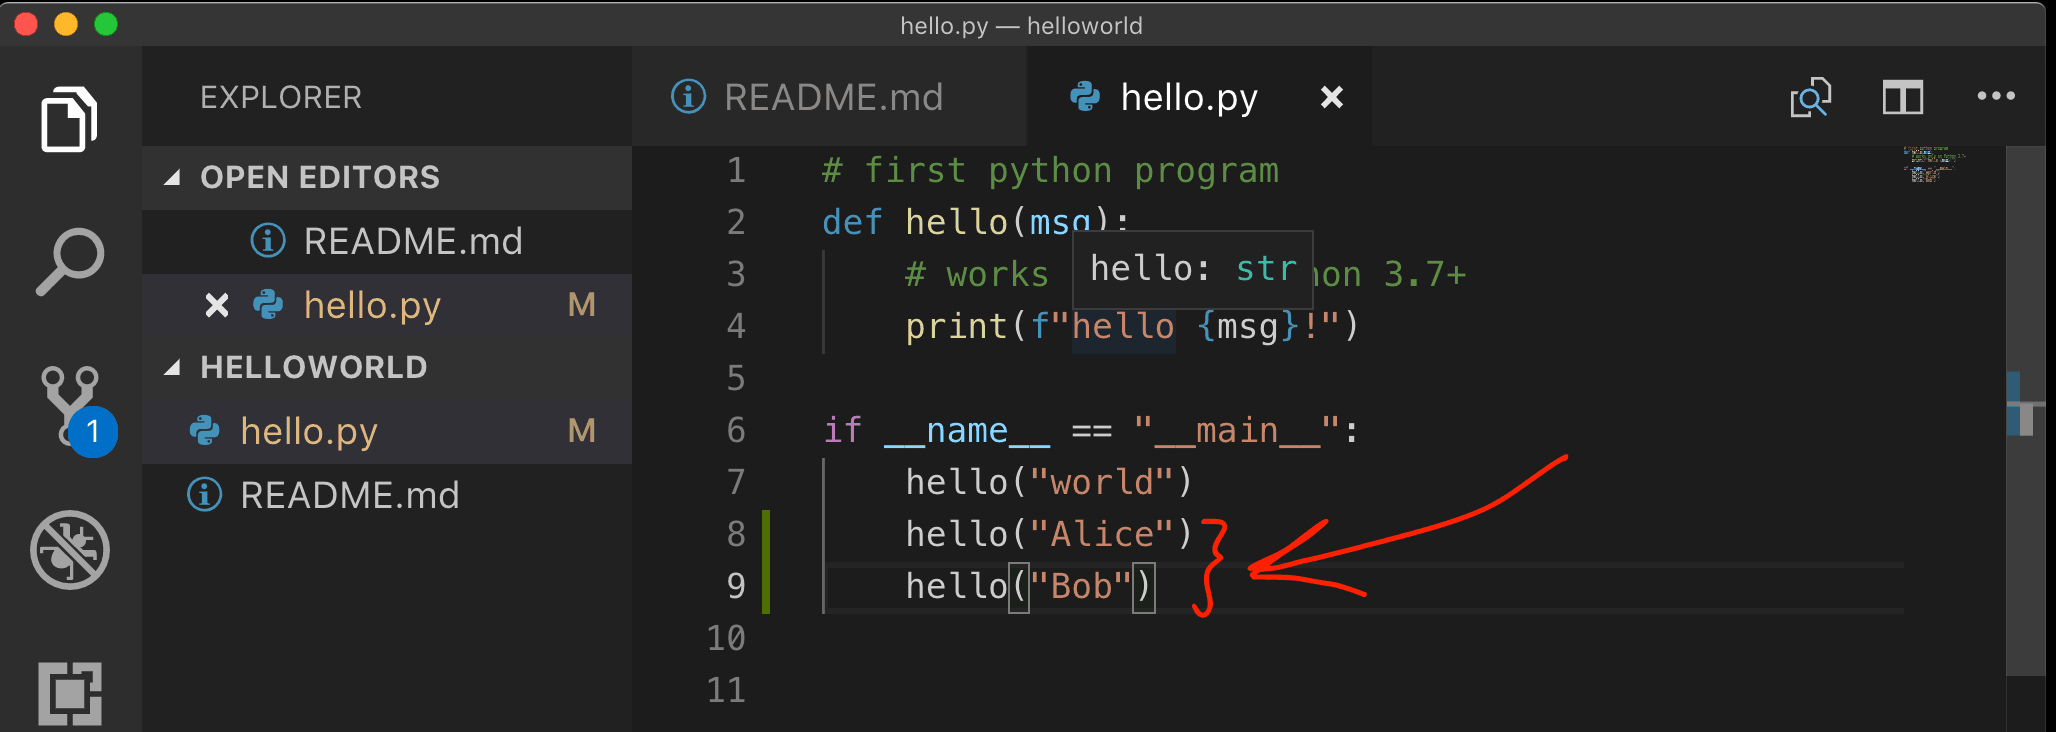

Awesome.
This is how the commits in our git repo look like now.
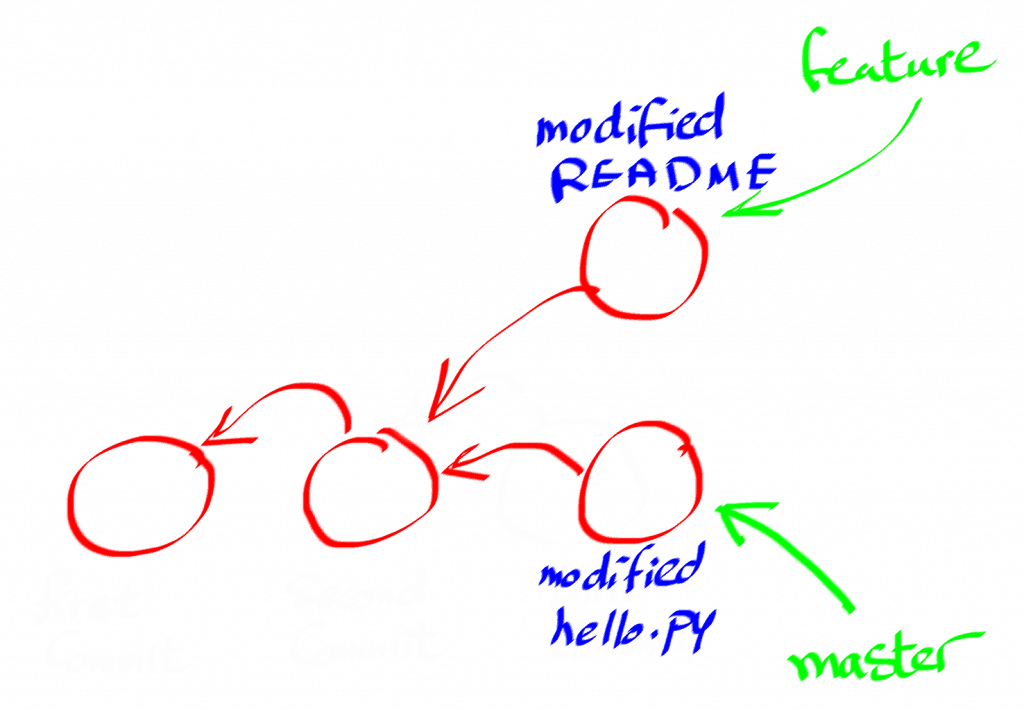
It is very obvious now that the commits do not form a linked list.
It actually looks like a tree data structure, right?
Well in this particular case yes, but in the next step, you will see that it can be transformed into a more generic data structure.
Step 3: Learn how to merge branches
There is no point in branching out without being able to merge branches back together.
In our example above, the main reason we branched out was because we wanted to experiment with creating a new feature (which is in our case a dummy README modification :)).
Now that we know that our feature is working, we want to merge this feature with the master branch.
Git allows you to merge branches in various ways.
But let’s use the simplest one, git merge
To merge the feature branch with the master branch, make sure you are on the master branch and then run the following command.

If you inspect both files now, you will see that the content of both branches have been merged.
When you merge two branches using git merge, git actually creates a new commit that has two parents from both branches.
That said, this is how the commit history looks like now.
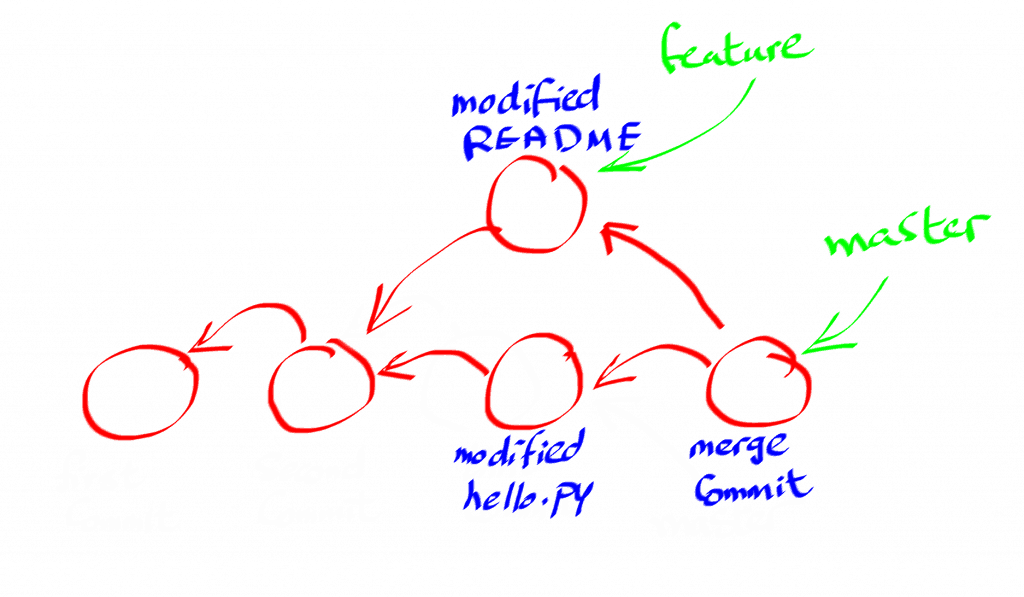
Now it’s not a tree anymore, is it?
Rather, it is a DAG (directed acyclic graph) with each commit pointing to its parent or parents.
Step 4: Learn how to resolve merge conflicts
Life is not always a bed of roses.
Sometimes when you try to merge two branches, conflicts will happen.
A conflict essentially means that two branches have modified the same part(s) of the same file(s).
When this happens, git will prompt you to resolve the conflicts first before resuming the merge process.
Needless to say, you have to be very careful about how you resolve these conflicts. Otherwise, bad things could happen.
This is one of the areas where you can easily mess up if you don’t know what you’re doing.
I have seen big chunks of code being destroyed after a merge process! This is not good for anyone, so don’t be that person 🙂
Step 5: Get comfortable with git remotes
Congratulation, now you are ready to fiddle with Github 🙂
Finally the time has come.
In addition to your local repo, git also allows you to have copies of your repo remotely.
This is what git remotes are and Github is a service that allows you to host a remote git repo in the cloud.
But what’s the point of these remote repos anyways?
Well, from a disaster recovery perspective , the more copies of your repo the better. If you accidentally completely hose your local repo, you can still have access to your source code.
From a collaboration perspective, this is where services like github and bitbucket shine.
The remote copy of the repo can act as the shared, point-of-truth repo for you and your colleagues.
Working collaboratively in this case entails pulling the source code from the remote repo to your local repo, doing your work locally, and then eventually pushing your work back to the remote repo.
Let’s actually create a remote repo on Github for our example project.
Go to this link and create a new repository helloworld.

This step creates an empty remote repository for you.
It also tells you exactly how to push your local git repo to Github.

Since we already have a local git repo, let’s push it upstream to Github.
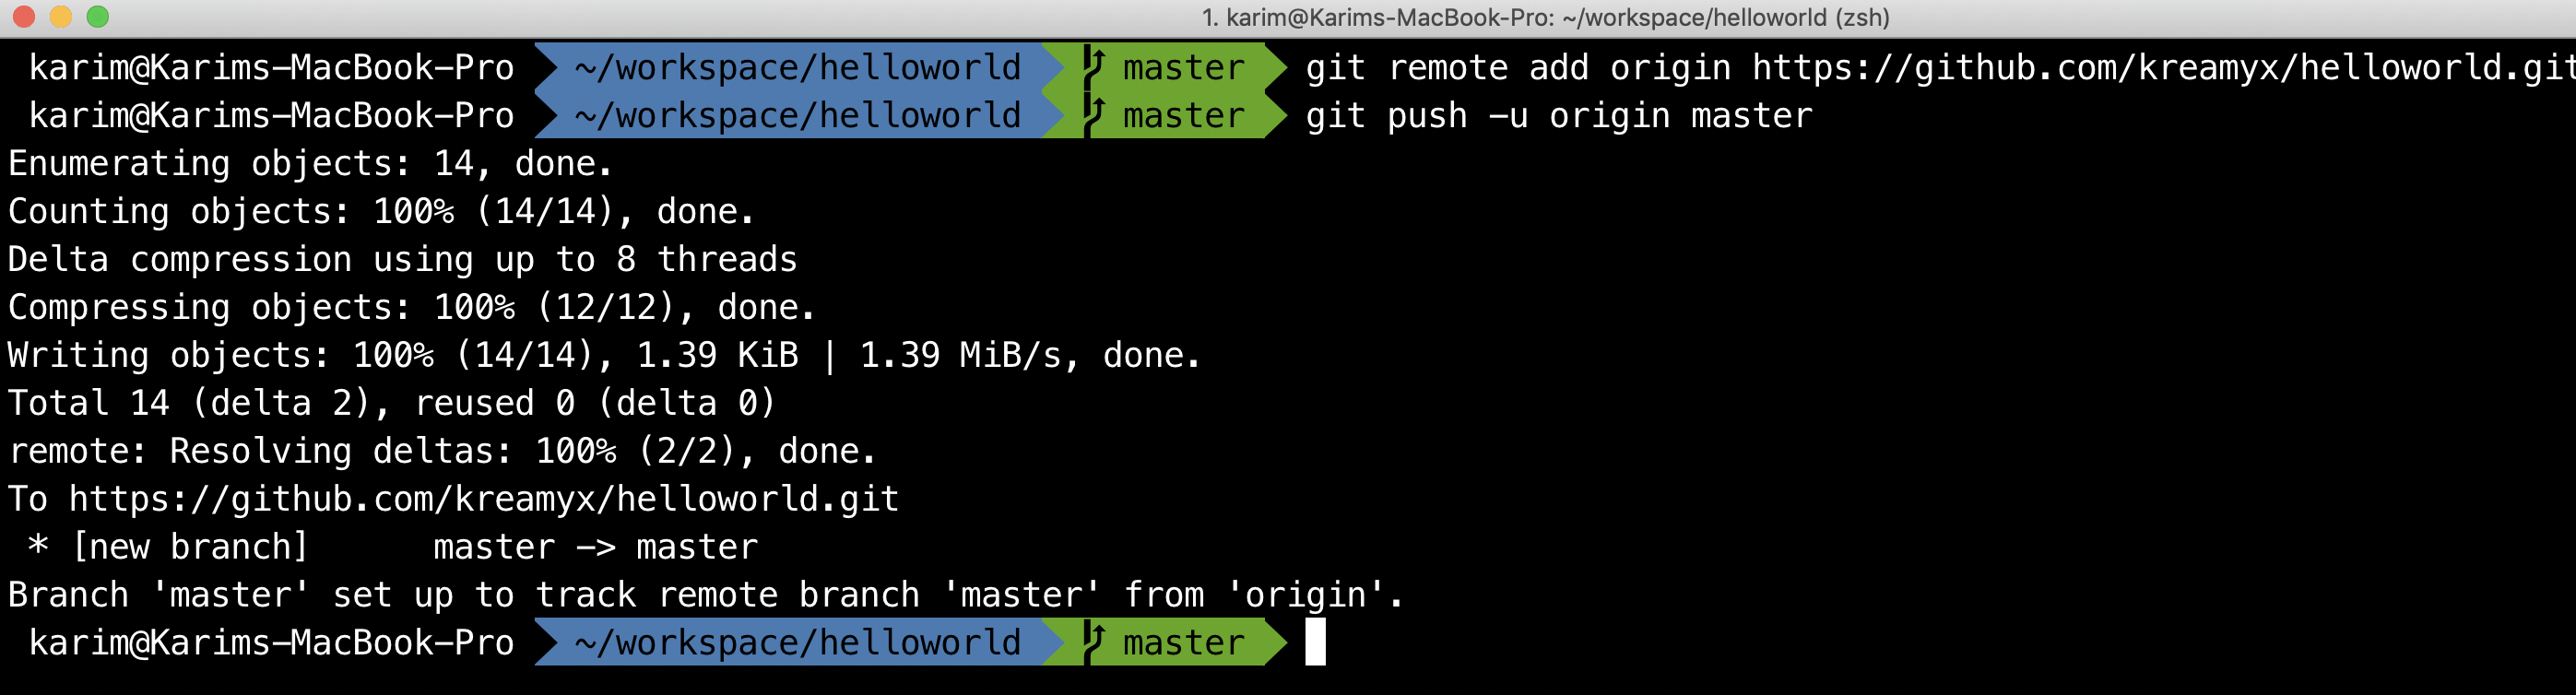
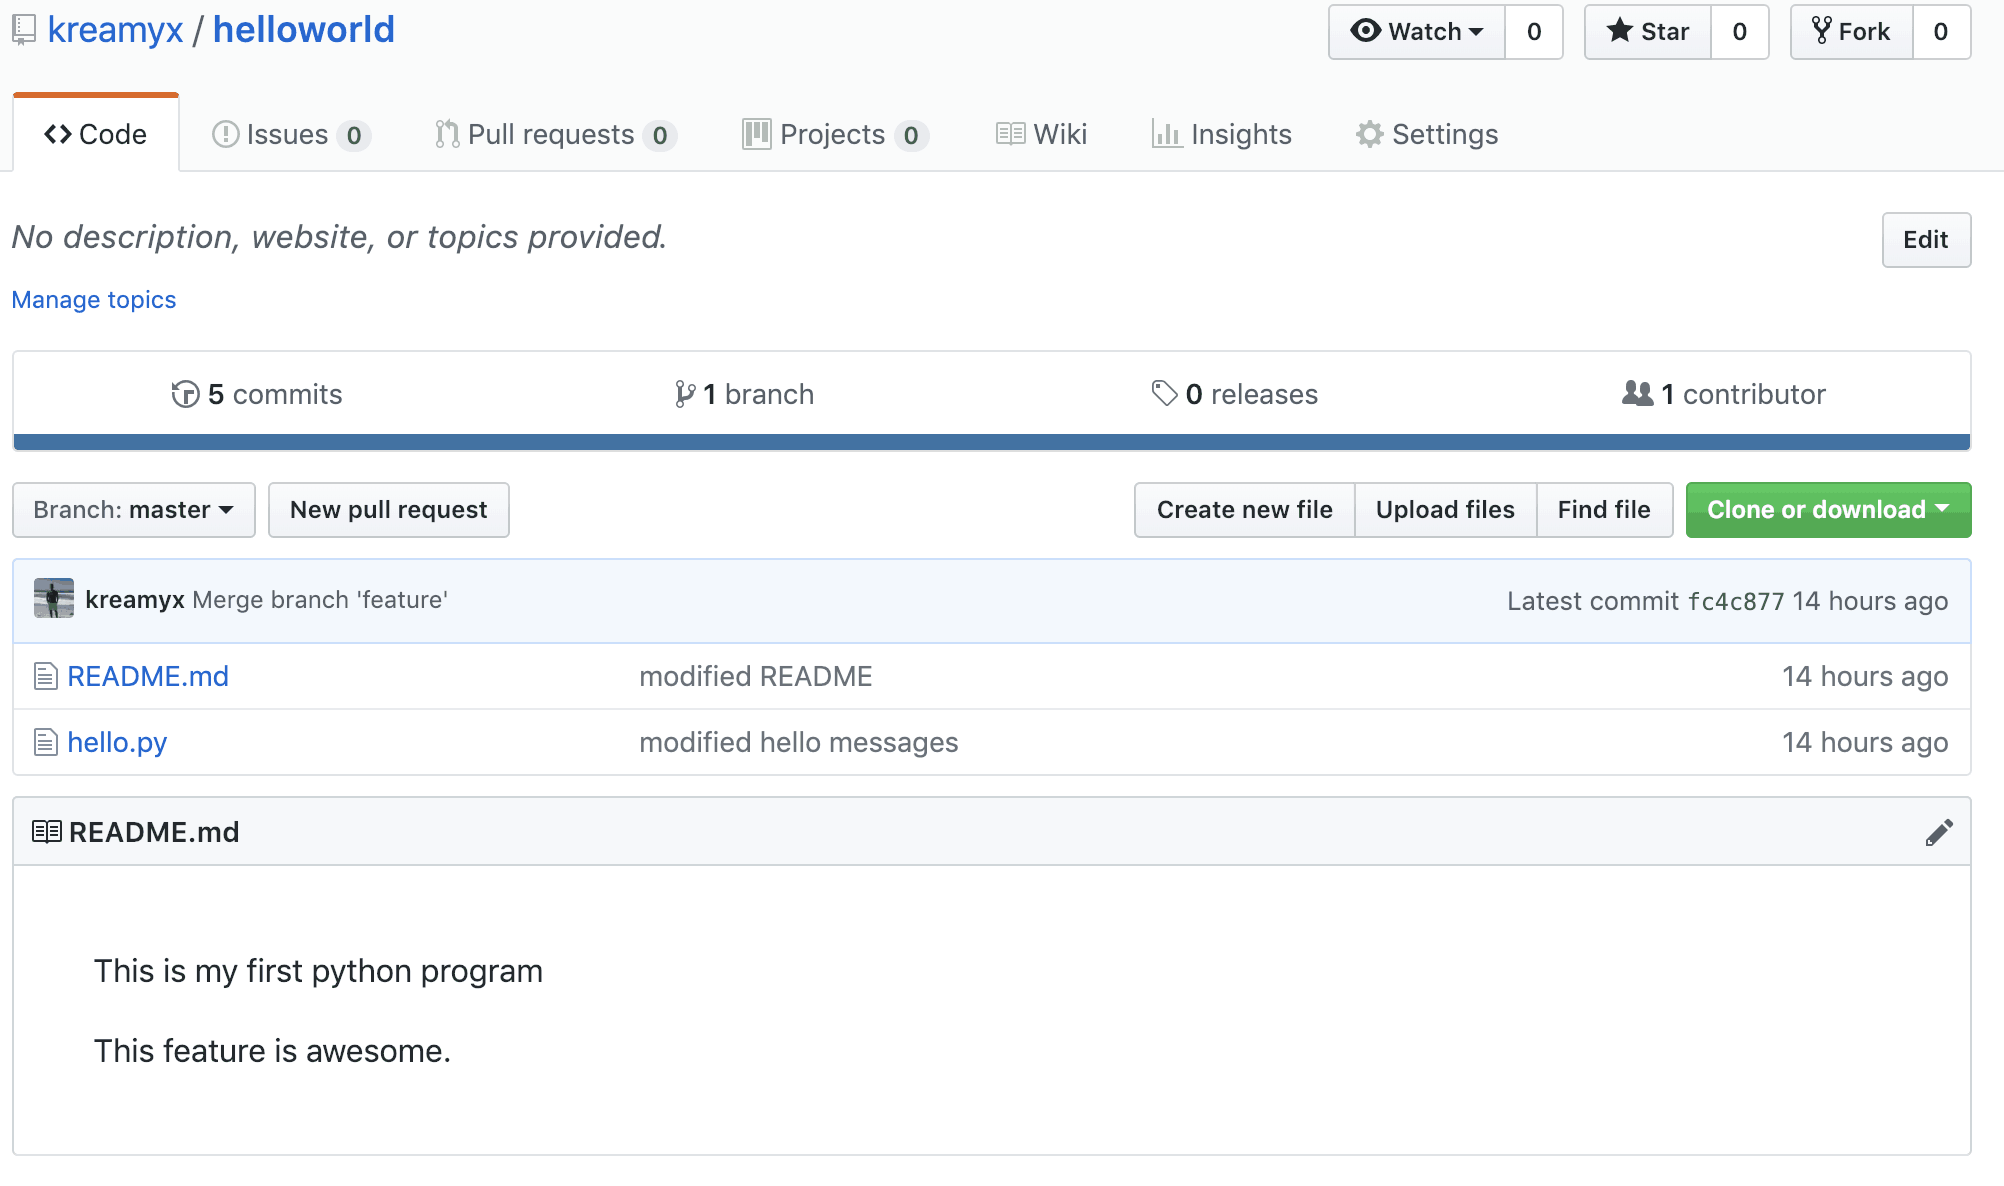
And there you go.
You just pushed your local repo remotely.
Now you have two copies of your local repo.
Final words
Now you have a bird’s eye view of what git is, what Github is, and how to go about learning them and in what order.
It is really important, and expected, in this day and age for any software engineer to be a git master.
From here, it is up to you to dive deeper and learn each of the concepts above in great depth.
Good luck 🙂
Featured Posts
- The Python Learning Path (From Beginner to Mastery)
- Learn Computer Science (From Zero to Hero)
- Coding Interview Preparation Guide
- The Programmer’s Guide to Stock Market Investing
- How to Start Your Programming Blog?
Are you Beginning your Programming Career?
I provide my best content for beginners in the newsletter.
- Python tips for beginners, intermediate, and advanced levels.
- CS Career tips and advice.
- Special discounts on my premium courses when they launch.
And so much more…